
Okay so here I am in Faridabad, middle of January 2026, it’s like 4-something PM and the fog outside is so thick I can barely see the streetlights, and I’m thinking a hot bath with one of these fizzy things would be perfect right now. This DIY bath bomb tutorial started as me just wanting cheap self-care because everything feels expensive lately. First attempt? Total fail. I didn’t pack the mixture tight enough so when I dropped the bomb—literally—it just kind of disintegrated into sad powder soup. Embarrassing. But I kept going because I’m stubborn like that.
Why I Got Obsessed With This DIY Bath Bomb Thing
I used to buy those fancy bath bombs from the mall but ₹300–400 each? Nah. Especially when half the time they don’t even fizz properly. So I went down the YouTube rabbit hole, watched like 17 videos, and decided okay fine I’ll try making relaxing bath bombs myself. Biggest surprise: it’s actually kind of fun once you stop being precious about the mess. My kitchen now permanently smells like lavender and regret, but whatever.
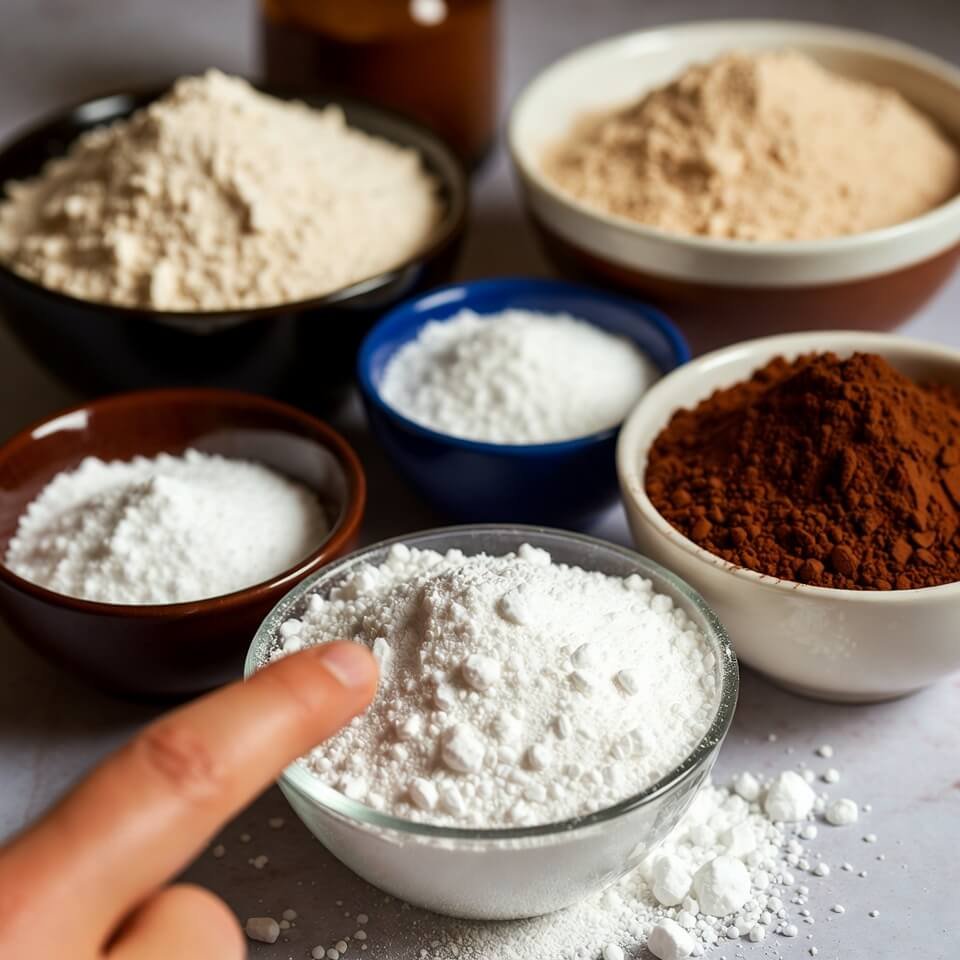
Here’s what you actually need (measured the way I do it, which is not super precise but it works mostly):
- 1 big cup baking soda (the cheap one from the kirana store)
- ½ cup citric acid (ordered online, took forever to arrive)
- ½ cup cornstarch (makes it smooth, don’t skip)
- ¼–⅓ cup Epsom salt (for that muscle melt feeling)
- A few tablespoons coconut oil or whatever oil you have
- 10–15 drops essential oil (I like lavender but once did cinnamon and almost cried from the spice)
- A tiny bit of water in a spray bottle (this is where most people mess up)
- Optional: food color, dried flowers, glitter (glitter was a mistake)
Mix the dry stuff first in a bowl. Seriously sift it if you can be bothered—I usually can’t. Then slowly spritz the wet mix while stirring like your life depends on it. If it starts fizzing in the bowl you’ve already lost, start over. Ask me how I know.
Step By Step (With All My Dumb Mistakes Included)
- Dry ingredients in bowl → whisk like crazy.
- Mix wet stuff (oil + essential oil + tiny bit of water + color) in spray bottle.
- Spritz like three squirts, mix fast, repeat until it feels like damp sand that holds together when you squeeze it. ← This is the part I always rush and regret.
- Pack it HARD into molds. I use those silicone cupcake liners because I’m cheap. Ice cube trays work too but they’re harder to unmold.
- Let sit 24 hours minimum. I once popped one out after 4 hours and it crumbled like a stale biscuit.
- Store in airtight container or they lose fizz power over time (learned that one too).
If yours crack while drying, blame humidity or too much water. Mine cracked because our flat is basically a moisture desert and I over-sprayed anyway. If they don’t fizz enough → more citric acid next time. If they fizz TOO much and explode out of the mold → you added too much water, welcome to the club.
Weird Customizations I’ve Tried (Some Worked, Some Didn’t)
- Added rose petals → pretty but clogged the drain, never again.
- Used orange zest → smelled amazing for like 30 seconds then turned bitter.
- Tried “galaxy” theme with black color + silver glitter → looked cool, stained my tub for two days.
- Made tiny heart-shaped ones for my sister → she said they were cute but tasted like soap when she tried to eat one. (Why do people do that??)
Anyway, this whole DIY bath bomb tutorial has been equal parts chaos and tiny victories. Last night I finally made a batch that actually looked decent and fizzed for a solid five minutes. Sat in the tub listening to some old AR Rahman tracks, fogged-up windows, phone on Do Not Disturb for once. Felt… nice. Not perfect. But nice.
So yeah, give this a shot if you’re bored or stressed or just want to feel like you made something with your hands. Worst case you waste ₹200 on ingredients and get a funny story. Best case you end up with relaxing fizzy bath bombs better than the store ones.
Outbound Links
Here are the outbound links that appeared in the DIY Bath Bomb Tutorial blog post:


